SSL Tunneling
I’ve been working with OCI (Oracle Cloud infrastructure) the past few months. Oracle has its own cloud environment a competitor to Azure and AWS. One of its offerings is IAAS (Infrastructure as a service). This allows you to define your own virtual machines to support Oracle databases and applications. Oracle provides many server templates, which covers things from a single database server to as complicated as Oracle E-Business Suite environments.
Before we get into ssl tunneling. The concept of using public/private keys for authentication needs to be understood. These keys need to be created and loaded to make tunneling effective
SSH Public Private Keys pairs
Many environments are using public/private ssl keys in place of passwords. To set up a public/private key is rather straightforward.
On your workstation let’screate a public/private key pair
Windows 10 includes openssl it can be used to generate the public private key pair. From a command prompt use the ssh-keygen program to create an ssh formatted public/private key pair
cd to the directory you want to create your key pair
ssh-keygen -t rsa -b 4096
put in name of the target key eg: test_rsa
Passphrase is optional (I generally don’t use it – all use of the key requires the pass phrase)
This will create 2 files private key test_rsa and public key test_rsa.pub
Secure your private key your access controls will only be as good as your private key security.
You need to give your public key to administrators of the machines you want access, so they can load it to the servers. I outline what they do later in cause you are the administrator of the machine.
Putty is a common ssh client. However it builds a key store that the linux environments do not like so I prefer to create keys with openssl then convert them to putty ppk file (using puttygen) for use by putty and other windows products.
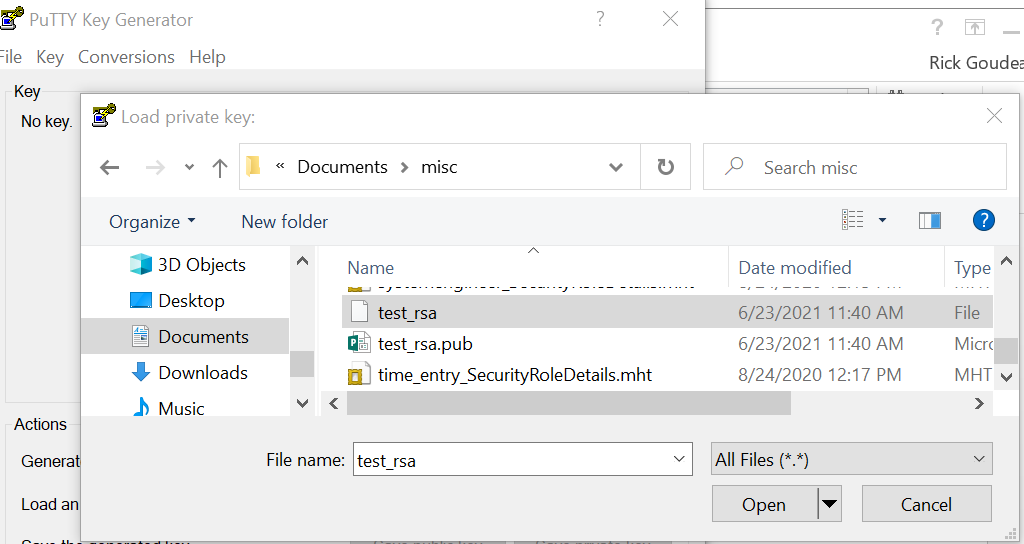
In puttygen -> Conversions -> Import Key -> Select the private key you just generated
Save generated key – (private key yes) public key at your discretion)
Save the file with a .ppk extension (I use the same base name as the openssl version).
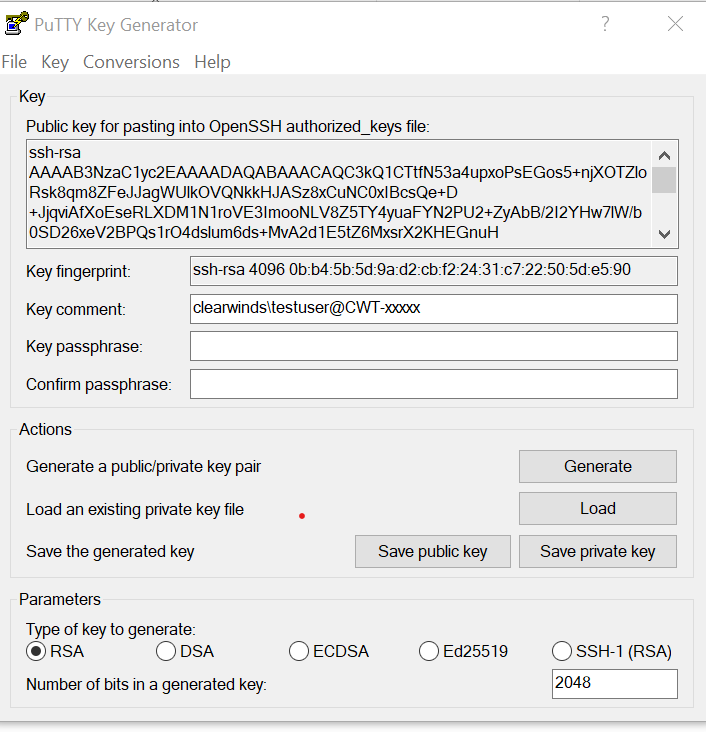
Notice that puttygen shows you the public key so you can copy and paste it for future use.
- A public key consists of 3 items
- Encryption type
- Base64-encoded-ssh-public-key
- Comment
The comment is used by you to identify who’s public key it is. It is usually user@machine name but it can be anything you want. Yes you can change it after the fact in a text editor.
Setting up the destination server
Now the key must be loaded on a destination machine and user:
To create a tunneling user from a admin account. Note you do not have to have the same
sudo useradd -m -c “SSL tunnel connection user” tester1
- sudo su – tester1
- mkdir ssh
- chmod 700 .ssh
- cd .ssh
- copy or paste the public key. In this case I copied but I could have
- vi test.pub and pasted the key from the editor
- cp /tmp/test.pub .
- cat test.pub > authorized_keys
- chmod 600 authorized_keys
It is important to set the permissions to the hidden directory .ssh and authorized keys to restrict only to the user. Now you should be able to ssh to the server without supplying a password.
- ssh -i <key_file> [email protected]
- eg:
- ssh -i C:\Users\testuser\.ssh [email protected]
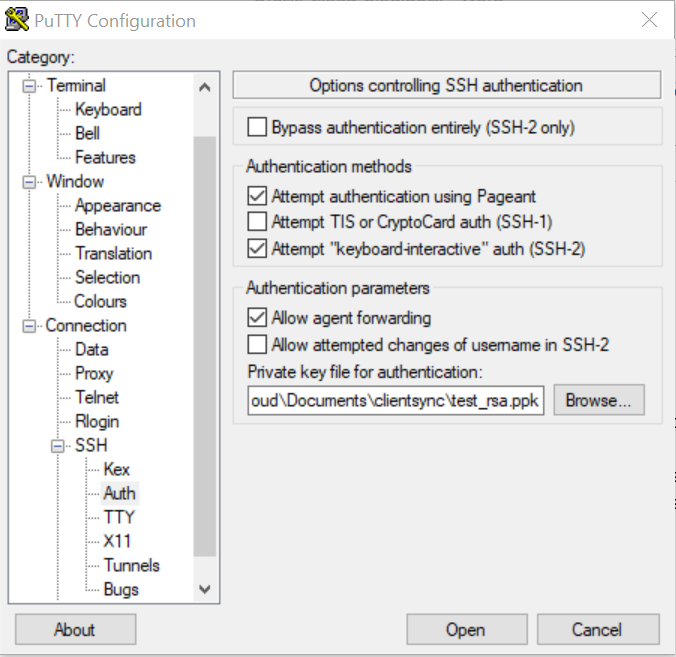
Settting up a connection
This will not ask for a password and automatically log you in. For putty you have add it to you profile – connection -> SSH -> Auth section. I save a profile for each machine so I don’t have to be constantly changing definitions